English
 Español
 عربى
عربى 中文简体
中文简体Content
- 1 1. What Makes a Good Ice Cooler Box?
- 2 2. How Long Do Coolers Keep Ice?
- 2.1 Cooler Size
- 2.2 Larger Volume = More Ice
- 2.3 Proportional to the Size of the Cooler
- 2.4 Practical Examples
- 2.5 External Conditions
- 2.6 Temperature and Humidity
- 2.7 Sun Exposure
- 2.8 Wind
- 2.9 Temperature and Retention Time
- 2.10 Pre-Chill Your Cooler
- 2.11 How to Pre-Chill Your Cooler
- 2.12 Benefits of Pre-Chilling
- 2.13 Ice Type
- 2.14 Block Ice
- 2.15 Cubed Ice
- 2.16 Best of Both Worlds: A Mix of Ice Types
- 3 3. Choosing the Right Size for Your Needs
- 4 4.Maximizing Ice Retention in Your Cooler
- 5 5. Maintaining and Cleaning Your Cooler
- 6 6. Built-In Cup Holders
- 6.1 Functionality and Convenience
- 6.2 Variations in Design
- 6.3 Practical Considerations
- 6.4 2. Wheels and Handles
- 6.5 The Importance of Wheels
- 6.6 Handle Design and Functionality
- 6.7 Special Considerations
- 6.8 3. Built-in Bottle Openers
- 6.9 Convenient and Practical
- 6.10 Versatility and Placement
- 6.11 4. Drain Plugs
- 6.12 How Drain Plugs Work
- 6.13 Maintenance and Ease of Use
- 7 7. Alternatives to Traditional Ice Coolers
In the heat of summer or during outdoor adventures, keeping your drinks and food cold is essential. Whether you’re embarking on a camping trip, hosting a beach party, or enjoying a tailgate event, having the right ice cooler box can make all the difference. With so many options on the market, choosing the best one can be overwhelming.
1. What Makes a Good Ice Cooler Box?
The primary function of an ice cooler box is to keep your food and beverages cold, whether you’re at a picnic, camping, or simply running errands. While many coolers are designed to perform this basic task, the efficiency and longevity of their performance depend on various factors. Understanding these elements will help you choose the best cooler box to suit your needs.
Insulation
The most important feature to consider when choosing an ice cooler box is its insulation. Insulation is what determines how long your cooler can keep its contents cold. The better the insulation, the longer it will preserve the cold temperature inside the cooler.
Types of Insulation
The insulation in coolers typically consists of polyurethane foam or extruded polystyrene (XPS). Both materials work to trap cold air and prevent the entry of warm air. Here’s a deeper look at each material:
-
Polyurethane Foam: This type of foam is highly efficient at maintaining low temperatures. It’s typically used in high-end coolers and is often very thick, which is why these coolers perform better. Polyurethane foam insulates the cooler and slows down the rate at which ice melts. It also provides structural integrity, helping coolers withstand pressure and external forces.
-
Extruded Polystyrene (XPS): Common in more affordable coolers, XPS provides effective insulation but may not be as long-lasting as polyurethane. XPS coolers are usually lighter, and while they do provide adequate cooling for short-term storage, they may not keep ice as long as polyurethane foam coolers.
How Insulation Affects Ice Retention
The thickness and density of the insulation material play a vital role in ice retention. A thicker layer of foam, combined with a tightly sealed design, results in a cooler that holds ice longer. In practice, a cooler with high-performance insulation might keep ice for several days, whereas one with inferior insulation might only keep things cold for a day or less.
The key to getting the most out of your insulation is choosing a cooler with uniform insulation coverage. If insulation is thin in some areas of the cooler, heat will seep in through those spots, reducing overall efficiency.
Material
The material used in the construction of the cooler box impacts both its durability and thermal performance. Coolers are usually made from various types of plastics, with rotomolded plastic and blow-molded plastic being the most common materials. Let’s take a look at how different materials affect the cooler’s performance.
Rotomolded Plastic Coolers
Rotomolded plastic coolers are made using a rotational molding process, where the plastic is heated and rotated in a mold to form a durable, seamless cooler. These coolers are known for their rugged durability and can withstand extreme conditions, including rough handling and extreme temperatures.
Advantages of Rotomolded Plastic Coolers:
- Durability: Rotomolded coolers are virtually indestructible and can survive a variety of impacts and harsh conditions.
- Longer Ice Retention: Because of their robust insulation and durable design, these coolers hold ice for a longer period of time.
- Better Sealing: The molding process results in a tighter seal between the lid and the body of the cooler, further improving ice retention.
Disadvantages:
- Weight: Rotomolded coolers tend to be heavy due to the thickness of their material and the structure needed to ensure durability.
- Cost: They are generally more expensive than blow-molded or lightweight coolers.
Blow-Molded Plastic Coolers
Blow-molded coolers are created using a different process, where plastic is inflated into a mold to create the cooler’s shape. This process is typically faster and more cost-effective, resulting in lightweight coolers that are easier to transport.
Advantages of Blow-Molded Plastic Coolers:
- Lightweight: These coolers are easier to carry, making them a great choice for people who need portability.
- Cost-Effective: Blow-molded coolers are generally less expensive than rotomolded options.
- Good for Short-Term Use: They are suitable for short outings or weekend trips where ice retention for a couple of days isn’t necessary.
Disadvantages:
- Weaker Durability: Blow-molded plastic coolers are less durable and more susceptible to cracking or breaking when exposed to rough handling.
- Shorter Ice Retention: Due to thinner insulation and less durable construction, these coolers typically do not retain ice as long as rotomolded coolers.
Seal and Latch System
A good seal and latch system are essential to maintaining the cold temperature inside your cooler. The design of the lid and how well it fits to the cooler’s body plays a crucial role in preventing cold air from escaping and warm air from entering.
Lid Seal
The seal around the lid is critical for the cooler’s performance. A tight-fitting lid with a durable seal, often made of rubber or silicone, ensures that the cooler remains airtight. Coolers with poor sealing systems will let cold air escape more easily, causing the ice to melt faster.
Why is an airtight seal important?
- Prevents heat exchange: Warm air is constantly trying to enter the cooler, especially when exposed to external temperatures. A good seal prevents this transfer.
- Keeps the cooler colder for longer: A tightly sealed cooler retains its internal temperature much more effectively, improving its overall performance.
Latch System
The latch system on a cooler is responsible for keeping the lid securely closed. High-quality latches ensure that the lid stays tightly shut, even when the cooler is knocked over or moved around.
Types of Latches:
- Heavy-duty latches: These are often made from stainless steel or high-grade plastic and are designed to handle rough conditions. Heavy-duty latches prevent the lid from opening prematurely, which would compromise the cooler’s performance.
- Self-locking latches: Some coolers come with built-in self-locking mechanisms that make it easier to keep the lid closed without having to manually lock and unlock it.
Advantages of a Good Latch System:
- Enhanced Insulation: A secure latch system prevents air from entering and ice from escaping, thus improving the cooler’s efficiency.
- Ease of Use: High-quality latches make it easier to open and close the cooler without struggling.
Disadvantages of Poor Latch Systems:
- Temperature Fluctuations: If the cooler’s lid is not properly latched, it can cause internal temperatures to fluctuate. This leads to faster ice melting and could spoil your food faster.
- Increased Wear and Tear: Poor-quality latches may break more easily over time, compromising the cooler’s ability to maintain cold temperatures.
2. How Long Do Coolers Keep Ice?
When you’re heading out for a weekend camping trip, beach day, or any activity where you need to keep your beverages and food cold, knowing how long your cooler will keep ice is crucial. Several factors influence how efficiently a cooler can maintain cold temperatures, and understanding these can help you choose the best cooler for your needs and ensure your food and drinks stay fresh for as long as possible.
Cooler Size
One of the most important factors in determining how long a cooler can keep ice is its size. Larger coolers have more internal space for both ice and food or beverages. This larger volume tends to keep the cooler cold for a longer period for several reasons:
Larger Volume = More Ice
With more space inside, you can use more ice, which helps to maintain a lower temperature for a longer period of time. The more ice in the cooler, the longer it will take to melt. Larger coolers also allow you to pack your food more efficiently, which helps with insulation and allows cold air to circulate better.
Proportional to the Size of the Cooler
While bigger coolers retain ice longer, they also tend to be bulkier and harder to transport. A large cooler might hold ice for 5 to 7 days, but you might find it difficult to move it around or store it in tight spaces. The key is to balance the size of the cooler with your transportation needs and the length of your trip.
Practical Examples
- Small Coolers (20-30 quarts): These coolers are portable and easy to carry, but they may only keep ice for 1 to 2 days in average conditions.
- Medium Coolers (40-50 quarts): These coolers are good for a weekend trip and can keep ice for 3 to 5 days, depending on external conditions.
- Large Coolers (60-100+ quarts): These coolers can keep ice for 5 to 7 days or longer, but they are heavy and not as portable.
External Conditions
The environment around your cooler plays a huge role in how long the ice will last. Factors such as the temperature outside, humidity, and exposure to direct sunlight can dramatically reduce the ice retention time.
Temperature and Humidity
Higher ambient temperatures will cause the ice to melt faster, especially if the cooler is exposed to direct sunlight. Additionally, if the air is humid, the ice will melt quicker because the surrounding warm air can transfer heat into the cooler more effectively. In cold conditions, ice retention can be much longer, but extreme cold might actually cause some of the cooler’s contents to freeze, which could affect food safety.
Sun Exposure
Direct sunlight on the cooler will heat up the surface and cause ice to melt faster. Keeping your cooler in the shade is essential. If you are at a beach or campsite, it’s best to cover the cooler with a cloth, umbrella, or tarp to protect it from the sun. The use of reflective cooler covers can also help minimize heat absorption from sunlight.
Wind
On windy days, ice can melt faster due to the warmer air moving over the cooler. Wind speeds can affect how well the insulation works by continuously pushing warm air toward the cooler.
Temperature and Retention Time
- Hot Day (80-90°F / 27-32°C): Ice will generally last 1 to 3 days, depending on cooler size and insulation.
- Cooler Days (50-70°F / 10-21°C): Ice can last 3 to 5 days, especially if the cooler is kept in the shade.
- Cold Conditions (Below 50°F / 10°C): Ice may last 7 days or more, but the cooler should be insulated properly to avoid any freezing issues.
Pre-Chill Your Cooler
One of the best tricks to help your cooler keep ice longer is to pre-chill it before use. Pre-chilling helps to lower the cooler’s internal temperature so it won’t have to work as hard to maintain a cold environment once the ice is packed in.
How to Pre-Chill Your Cooler
- Step 1: Place Ice in the Cooler
Place a few pounds of ice inside the cooler and leave it for several hours (or overnight if possible). This ensures that the cooler itself is already cold when you add fresh ice, preventing rapid ice melting. - Step 2: Empty the Cooler Before Packing
Remove the ice and any water that may have accumulated. This helps to create an environment where the cooler stays cold longer without the added heat from residual warm air inside.
Benefits of Pre-Chilling
- Pre-chilling lowers the temperature inside the cooler immediately, making it more efficient at holding cold.
- It ensures that the first batch of ice won’t melt as quickly, giving you a better head start on keeping your food and drinks cold.
- It helps maintain even temperature distribution inside the cooler.
Ice Type
The type of ice you use inside your cooler plays a huge role in how long it will stay cold. There are two common types of ice: block ice and cubed ice. Each has its own benefits when it comes to ice retention.
Block Ice
Block ice is a large, solid chunk of ice that melts much more slowly than smaller pieces. This is because it has a smaller surface area relative to its volume, meaning there is less contact with the surrounding air, which slows down the melting process.
Advantages of Block Ice
- Block ice melts much slower than smaller ice cubes, making it ideal for long trips.
- It also has a more consistent melt rate and doesn’t cause water to accumulate quickly.
- Large blocks can be placed on the bottom and top of your cooler to provide a consistent cold temperature throughout.
When to Use Block Ice
- Block ice is ideal for extended trips where ice retention is crucial, such as multi-day camping or boating trips.
- If you’re looking to keep larger amounts of food or drinks cold for several days, using block ice is highly recommended.
Cubed Ice
Cubed ice is the most common form of ice, and it’s typically less expensive and easier to source. While it melts faster than block ice, it still provides a good level of cooling for short trips.
Advantages of Cubed Ice
- It cools quickly and is great for quick access to chilled beverages.
- Cubed ice is readily available and is usually cheaper than block ice.
- It’s perfect for short trips (1 to 2 days) where you don’t need to keep ice for extended periods.
When to Use Cubed Ice
- If you’re going on a short trip where ice retention isn’t as critical, cubed ice is sufficient.
- For social events, where the ice will be frequently accessed, cubed ice is a more convenient choice.
Best of Both Worlds: A Mix of Ice Types
Using a combination of both block and cubed ice is a great strategy for getting the most out of your cooler. The block ice can provide long-lasting cooling, while cubed ice can be used to chill drinks and food quickly.
How to Combine Block and Cubed Ice
- Place the block ice at the bottom of the cooler to create a cold foundation.
- Add a layer of cubed ice on top to cool your drinks and snacks faster.
- This combination can keep your cooler cold for several days while still ensuring quick access to ice-cold beverages.
3. Choosing the Right Size for Your Needs
When selecting a cooler, size is one of the most critical factors to consider. Choosing the right size ensures that you can store enough food, drinks, and ice for your specific outing, while also making sure that the cooler is portable and convenient for you to carry. Understanding the different cooler sizes and their best uses will help you make an informed decision that suits your needs.
Personal Use or Small Outings
For those who usually go on quick, short trips with just one or two people, a small cooler is often more than enough. A cooler in the 20-30 quart range is ideal for personal use, offering the right balance between portability and capacity.
Why 20-30 Quart Coolers Work Best:
- Compact and Lightweight: These coolers are generally small, making them easy to carry. If you’re hiking or going on a short trip, you’ll appreciate the ability to carry it with one hand or easily stow it in your car.
- Perfect for Snacks and Beverages: For a day trip, you don’t need an enormous cooler. A 20-30 quart cooler can hold enough drinks, snacks, or a small amount of food for one or two people.
- Good Insulation for Short Periods: These coolers are designed to keep things cold for a short duration—typically for 8-12 hours, depending on external factors like temperature and ice quality.
Common Uses:
- Day Trips: Whether it’s a picnic at the park, a day on the beach, or a fishing outing, these coolers can easily store enough provisions for a few hours.
- Tailgating: For a small gathering of friends, a 20-30 quart cooler can hold just the right amount of drinks and snacks without taking up too much space.
Things to Consider:
- Storage Space: If you’re bringing a variety of foods, consider how much space you need for each item. These smaller coolers may not have the flexibility for bulkier items like large bottles of soda or big sandwich trays.
- Ice Duration: Small coolers might not retain ice for as long as larger ones, so it’s important to keep in mind that you may need to replenish ice during your outing.
Family Trips or Weekend Camping
For families or groups heading out for a weekend camping trip, you need something bigger than a personal cooler. A 40-70 quart cooler is typically the best choice for medium-sized groups (around 4-6 people) and offers more capacity to store food and drinks for a longer duration.
Why 40-70 Quart Coolers Work Best:
- Larger Capacity: This size provides enough room to pack more food, snacks, and drinks, allowing you to cater to more people. It can easily store enough items for a weekend trip, with some leftover room for extra ice.
- Retains Ice Longer: Coolers in this size range are built to keep ice for longer periods—usually up to 3-4 days. This feature is especially beneficial for multi-day camping trips where you need to preserve food for a longer time.
- Easy to Transport with More Than One Person: While it can still be portable, a cooler in the 40-70 quart range might be a little heavier, so having two people to help carry it can make it more manageable.
Common Uses:
- Weekend Camping: When you’re out camping with family or a group of friends, you need more space to store perishable food and drink items. These coolers provide sufficient room to handle bulkier items like whole chickens, larger cuts of meat, or big fruit trays.
- Road Trips: When embarking on a road trip, these coolers help keep everything cool for multiple days. They are big enough to store enough beverages and meals for the journey without taking up too much trunk space.
- Picnics or BBQs: If you’re hosting a larger family gathering or BBQ, a 40-70 quart cooler is perfect for keeping drinks and perishable foods cool throughout the event.
Things to Consider:
- Weight: These coolers can be heavy when filled, so make sure to check if the cooler is equipped with features like sturdy wheels or long handles to make transportation easier.
- Storage Space at Home: Larger coolers take up more storage space when not in use, so make sure you have enough room at home for a cooler of this size.
Extended Use (Multiple Days)
For serious campers, hunters, or road-trippers who plan to be on the move for several days, a 100+ quart cooler is your best bet. This size is built to handle extended outings, keeping large amounts of food and drinks cold for up to a week or more.
Why 100+ Quart Coolers Work Best:
- Massive Capacity: These coolers can hold large quantities of food, drinks, and ice. Some models can fit up to 150 cans and still leave room for ice and other items. This capacity is ideal for extended camping trips, hunting expeditions, or large group outings.
- Superior Insulation: Larger coolers typically have thick insulation, which allows them to maintain low temperatures for extended periods. Many high-end models can keep ice for up to 7 days, making them perfect for multi-day camping trips or long road trips through hot climates.
- Durable Construction: Coolers in this size range are typically built for tough conditions. Whether it’s rough terrain, extreme temperatures, or a long travel period, these coolers are designed to withstand the rigors of extended use.
Common Uses:
- Extended Camping or Hunting Trips: If you’re planning to camp in remote areas where access to fresh supplies is limited, a 100+ quart cooler allows you to pack enough food to last several days. It’s also essential for storing game or fish caught during extended trips.
- Family Reunions or Large Gatherings: Large family gatherings or reunions benefit from these coolers since they can hold enough beverages and food for big groups. Whether it’s a beach party or an outdoor wedding, this size cooler is ideal for keeping everything cool.
- Overlanding or Off-Road Adventures: If you’re planning a lengthy off-road journey or an overland expedition, a 100+ quart cooler is a must-have. It ensures that your food and drinks stay fresh during long stretches without access to stores or refrigeration.
Things to Consider:
- Heavier and Bulkier: Larger coolers are harder to transport, especially when they’re filled with ice and food. Be sure the cooler has wheels or handles that make it easier to move around.
- Requires a Lot of Space: These coolers take up a significant amount of room in your car or RV, so you’ll need to ensure that you have adequate space for one if you’re traveling by vehicle.
Cooler Size Comparison
To make it easier to visualize how different cooler sizes compare, here’s a table to give you an idea of how much each size typically holds:
| Cooler Size | Best For | Capacity | Ice Retention |
|---|---|---|---|
| 20-30 Quart | Personal use, day trips | 12-30 cans, small meals | 8-12 hours |
| 40-70 Quart | Family trips, weekend camping | 30-70 cans, multiple meals | 2-4 days |
| 100+ Quart | Extended trips, large groups | 70+ cans, large meals | 5-7 days |
This breakdown helps to clarify that a cooler’s size and ice retention capabilities must align with the length and type of your trip.
4.Maximizing Ice Retention in Your Cooler
When embarking on a trip that involves using a cooler, one of the most important factors to consider is how long the ice will last. Whether you are on a short picnic or an extended camping expedition, maximizing ice retention is essential for keeping your food and beverages fresh. There are several strategies and tips that can help you extend the amount of time your cooler remains cold and effective.
Use a Cooler Divider
A cooler divider is one of the simplest yet most effective ways to enhance the performance of your cooler. Coolers often come with dividers, or they can be purchased separately. A cooler divider helps organize the items inside the cooler, but more importantly, it prevents food from coming into direct contact with the ice or water that forms as the ice melts.
How it works:
When you place food directly in contact with the ice, it may start to thaw faster due to the colder temperatures of the ice and the surrounding water. Water from the melting ice, especially if it’s not drained, can cause certain foods to spoil faster. For example, fresh meat or dairy products may begin to deteriorate in a moist environment. By using a divider, you create a separation between the ice and your food, allowing the cooler to maintain a lower temperature while keeping the food dry and safe.
Benefits of Cooler Dividers:
- Prevents contamination: Since your food stays dry and separate from the ice, there’s less chance of cross-contamination, which is vital for food safety.
- Improved ice retention: By limiting the exposure of ice to food, you reduce the rate at which the ice melts, leading to extended cooling time.
- Enhanced organization: Dividers help organize your cooler, making it easier to access items when needed.
Don’t Over-Pack Your Cooler
It might seem counterintuitive, but packing your cooler too tightly can actually reduce its efficiency. Overpacking a cooler restricts airflow inside, which hinders the cooler’s ability to maintain a cold environment. When cool air can’t circulate properly, the ice melts faster, and the overall temperature of the cooler rises.
Why it happens:
Coolers rely on the flow of cold air to maintain a consistent temperature. If items are crammed into the cooler with no room for air to circulate, the ice will have a harder time cooling everything efficiently. As a result, the ice melts quicker, and the food inside doesn’t stay as cold.
Tips for Proper Packing:
- Leave space for airflow: When packing your cooler, try to leave a little space around your items to allow cold air to circulate. The cooler should not be packed so tightly that the lid is hard to close or that food is pressed up against the sides of the cooler.
- Pack in layers: You can maximize space by layering your cooler. Start with a base layer of ice, followed by heavier items like drinks, and finish with more perishable items at the top. This ensures the ice stays in contact with the items that need to remain cold the longest, while the items on top won’t be exposed to ice water.
- Use the “Tetris” method: Be strategic when arranging the cooler’s contents. Pack items in a way that maximizes space and prevents gaps, but still leaves some room for airflow.
Use Dry Ice
Dry ice is a fantastic option when you need to keep your cooler cool for a longer period of time, especially during multi-day trips. Unlike regular ice, which melts into water, dry ice sublimes directly into gas without leaving any liquid behind. This unique property makes it especially useful for long trips where maintaining freezing temperatures is essential.
How dry ice works:
Dry ice has a temperature of around -109°F (-78°C), which is much colder than regular ice. When placed in a cooler, it maintains a much lower temperature and slows down the melting of regular ice. If used correctly, dry ice can keep your cooler at sub-zero temperatures for several days, which is ideal for preserving frozen foods or ensuring that your cooler stays cold even on long trips.
Caution when using dry ice:
While dry ice is incredibly effective, it must be handled carefully. It is not suitable for use in sealed or airtight coolers, as the sublimation of the dry ice will produce carbon dioxide gas. In confined spaces, this can be dangerous because of the risk of carbon dioxide buildup, which can lead to suffocation. Therefore, if you plan on using dry ice, make sure the cooler has proper ventilation.
Tips for using dry ice safely:
- Ensure ventilation: Make sure your cooler has vents or air holes to allow the carbon dioxide gas to escape safely.
- Use gloves: Dry ice is extremely cold and can cause severe frostbite. Always handle it with thick gloves or insulated tools.
- Don’t store in an airtight cooler: Dry ice needs to be placed in a cooler that isn’t completely airtight. Otherwise, the gas buildup can damage the cooler or, worse, create a dangerous environment.
- Avoid direct contact with food: Just like regular ice, dry ice can cause food to freeze if it comes into direct contact with it. Make sure to use dividers or place food in bags to prevent direct contact with the dry ice.
Additional Tips to Maximize Ice Retention:
- Pre-chill the cooler: Before you put your food and ice in the cooler, pre-chill it by placing ice or cold packs inside for a few hours. This ensures that the cooler is already at a low temperature, reducing the amount of time needed for the ice to cool the cooler.
- Use block ice instead of cubes: Block ice lasts longer than ice cubes because it has less surface area exposed to the air. While it may take a little longer to chill the contents of the cooler, it will help your ice last much longer.
- Keep the cooler closed: Once your cooler is packed, try to minimize opening the lid. Every time you open it, warm air enters, and the ice will begin to melt faster. If you need to access something, try to do it quickly and close the cooler right away.
- Cover the cooler: If you’re in direct sunlight, try to cover the cooler with a reflective blanket or tarp. The reflective surface will deflect the sun’s rays, helping to keep the cooler cooler.
5. Maintaining and Cleaning Your Cooler
Proper maintenance and cleaning of your cooler are essential for ensuring its longevity and maintaining its cooling efficiency. Coolers are subjected to various conditions such as moisture, dirt, heat, and frequent handling, which can lead to wear and tear over time. By taking the necessary steps to clean and maintain your cooler, you can extend its lifespan and preserve its functionality.
Clean After Every Use
One of the most important steps in maintaining your cooler is cleaning it thoroughly after every use. This not only helps remove any residues that could lead to unpleasant odors or mold growth but also keeps the cooler functioning at its best.
Step-by-Step Cleaning Guide:
-
Empty the Cooler Completely:
Before starting the cleaning process, ensure that your cooler is completely empty. Remove any remaining ice, water, food particles, or other items. -
Disinfect with Mild Soap and Water:
Use a mild soap and warm water solution to clean the interior and exterior of the cooler. Avoid harsh chemicals like bleach, which can damage the materials and leave behind strong odors. -
Scrub Hard-to-Reach Areas:
If there are any stubborn stains or build-up, use a soft brush or sponge to scrub those areas. Focus on corners and grooves where food particles can get trapped. -
Rinse Thoroughly:
After scrubbing, rinse the cooler thoroughly with clean water to remove any soap residue. Soap left behind can degrade the cooler over time and lead to unpleasant smells. -
Dry Properly:
Once cleaned, allow the cooler to dry completely before storing it. This will prevent moisture buildup, which can lead to mold growth. If you’re in a hurry, you can use a clean cloth to wipe it dry, or place it in a well-ventilated area to air dry. -
Odor Control:
If your cooler develops odors despite cleaning, consider using baking soda. Place a small amount inside the cooler and close the lid overnight. The baking soda will absorb any lingering smells.
By cleaning your cooler after each use, you ensure that it remains in good condition and free from the buildup of bacteria or mold.
Keep It in a Dry, Cool Place
Proper storage is just as important as cleaning when it comes to maintaining your cooler. If you store your cooler improperly, you risk premature wear, mold growth, or material degradation.
Why Proper Storage Matters:
Coolers are often made of durable plastics, metals, or a combination of both. Exposure to excessive heat, moisture, or sunlight can degrade these materials over time, causing the cooler to lose its insulating properties or become brittle and cracked.
Storage Tips:
-
Store in a Dry Area:
Always store your cooler in a dry, cool place when it’s not in use. Moisture can cause rusting on metal parts, promote mold growth, and damage the seal. A dry, cool environment will protect it from these risks. -
Avoid Direct Sunlight:
While it’s tempting to leave your cooler outdoors after a day at the beach or during a camping trip, prolonged exposure to direct sunlight can cause the plastic or rubber to fade, crack, or become brittle. Store it in a shaded or covered area to preserve its durability. -
Elevate If Possible:
If possible, elevate your cooler slightly off the ground to prevent it from sitting in pools of water or dirt. Use a shelf, rack, or elevated platform for this purpose. -
Check Temperature and Humidity:
Extreme temperatures and high humidity levels can cause the cooler’s materials to warp or degrade. If you live in an area with intense heat or humidity, consider storing your cooler indoors, where temperature and humidity levels are more stable. -
Use a Protective Cover:
If storing your cooler outdoors is unavoidable, invest in a protective cover. A weather-resistant cover will shield your cooler from the elements, such as rain, snow, and UV rays.
By storing your cooler properly, you prevent unnecessary damage and keep it ready for the next adventure.
Check the Seal
The seals on your cooler’s lid are one of the most important components for maintaining its cooling efficiency. A damaged or deteriorating seal can drastically reduce the cooler’s ability to keep ice frozen for extended periods. Regularly checking and maintaining these seals is vital to ensure optimal performance.
Why Seals Are Crucial:
Cooler seals are designed to create an airtight and watertight barrier between the inside and outside of the cooler. When the seal is compromised, warm air and moisture can enter the cooler, causing ice to melt faster and making the cooler less efficient. A high-quality seal ensures that your cooler performs as expected, keeping your food and drinks cool for longer.
Steps for Seal Maintenance:
-
Inspect Regularly:
Periodically inspect the seals for any signs of wear, cracking, or damage. Pay special attention to the areas where the lid meets the cooler body, as this is where the most stress occurs. -
Clean the Seals:
Cleaning the seals should be a regular part of your cooler maintenance routine. Use a soft cloth and mild soap solution to gently wipe away any dirt, food particles, or grime that may have built up on the seals. Avoid using abrasive materials that could scratch or damage the rubber. -
Lubricate the Seals:
To maintain flexibility and prevent cracking, consider lubricating the seals every few months. Use a food-safe silicone lubricant or petroleum jelly on the seals. Apply a thin, even layer, making sure not to overdo it, as excess lubricant can attract dirt. -
Test the Seal:
Once the seals are cleaned and lubricated, perform a simple “seal test.” Close the cooler and press down on the lid to create a seal. If you notice gaps or areas where air can escape, the seal may be compromised. You can also use a flashlight to check for light leakage when the lid is closed. -
Replace Damaged Seals:
If you notice cracks, tears, or severe wear, it’s time to replace the seal. Many coolers offer replacement seals that can be easily installed. Replacing the seal will restore the cooler’s effectiveness and prevent further damage.
A well-maintained seal ensures that your cooler performs efficiently, keeping the cold in and the heat out.
Here’s a quick summary of the main steps to maintain your cooler:
| Maintenance Task | Frequency | Recommended Actions |
|---|---|---|
| Clean After Every Use | After each use | Use mild soap, warm water, and a soft brush to clean. Rinse thoroughly and dry completely. |
| Store Properly | After each use | Keep in a dry, cool, shaded area. Avoid direct sunlight or humid conditions. Use a protective cover if storing outdoors. |
| Inspect and Maintain Seals | Monthly or as needed | Regularly check seals for damage or wear. Clean, lubricate, and replace if necessary to ensure airtight seals for optimal cooling. |
6. Built-In Cup Holders
One of the most convenient features found in modern coolers is the inclusion of built-in cup holders. Whether you’re enjoying a picnic, camping trip, or a day at the beach, these cup holders ensure that your drinks are easily accessible and securely placed. No more worrying about your drink tipping over or searching for a flat surface to rest it on.
Functionality and Convenience
Built-in cup holders are strategically placed in many coolers, often on the lid or on the side of the cooler. These holders are designed to accommodate standard-sized cans, bottles, or cups, making it easier for you to keep your beverages right within reach. Some coolers even offer additional features such as molded indentations to hold different sizes of drinkware.
What makes this feature even more impressive is the convenience it brings. When you’re outdoors, there’s often limited space to set things down. You might be standing, sitting on a blanket, or lounging on a chair. With cup holders, you can keep your drinks upright and close by, reducing the risk of spillage or losing your drink in the sand or grass.
Variations in Design
Cooler manufacturers have designed different cup holder styles to fit various types of coolers. Some coolers offer cup holders that are part of a larger, integrated lid with a compartment for easy storage. Others have cup holders molded directly into the cooler’s body, often alongside the cooler’s handles. These molded cup holders are particularly convenient for keeping drinks secure during transport.
Some premium coolers even have insulated cup holders, designed to keep your drink cold for a longer period. This ensures that your drinks maintain their temperature, whether you’re sipping on an ice-cold soda or a chilled beer. Such features are especially beneficial on hot days when the sun can quickly warm up your beverage.
Practical Considerations
While cup holders are a great addition, it’s important to consider their placement in relation to the cooler’s overall design. Cup holders on the lid can be a double-edged sword; they provide easy access but can sometimes interfere with closing the cooler or stacking items on top. On the other hand, side-mounted holders might add extra bulk to the cooler, which can be cumbersome when storing it in a vehicle or in tight spaces.
In summary, built-in cup holders make outdoor adventures much easier by offering a stable and convenient way to store and access drinks. When choosing a cooler, consider whether the cup holders’ size and location align with your needs and how much space you have.
2. Wheels and Handles
Transporting a heavy cooler across uneven terrain or through a crowded park can be a challenging task, but modern coolers now come equipped with sturdy wheels and ergonomic handles to make the job easier. This feature is particularly essential for larger coolers that are designed to hold more ice and beverages.
The Importance of Wheels
Wheels are an indispensable feature, especially for those who need to move large coolers over long distances or rough terrain. The wheels on most modern coolers are durable and designed to withstand various surfaces such as gravel, sand, or dirt. These heavy-duty wheels are often made from rubber or similar materials, providing excellent traction and reducing the risk of the cooler getting stuck in soft ground.
Wheeled coolers offer a level of comfort and ease that is unmatched by traditional models. Instead of lifting the cooler or dragging it by hand, you can roll it effortlessly. Many models come with a retractable handle, allowing you to pull the cooler like a suitcase. This can make a huge difference, especially when you have multiple items to carry or when you’re traveling long distances.
Handle Design and Functionality
Handles are another critical feature for coolers. Ergonomically designed handles reduce strain on your hands and back when lifting the cooler. Some coolers offer both side handles and retractable handles, providing flexibility based on the situation. For example, side handles are perfect for lifting a cooler onto a countertop or into the back of a truck, while retractable handles make it easy to pull the cooler when you’re walking or rolling it over longer distances.
Retractable handles often come with telescoping designs, allowing you to adjust the height of the handle for comfortable use by people of different heights. Some coolers even feature molded handles that integrate seamlessly with the body of the cooler, making them easy to grip and maneuver.
Special Considerations
When shopping for a cooler with wheels and handles, it’s important to consider the size and weight of the cooler. Larger coolers tend to be heavier, even with wheels, so it’s essential to ensure that the wheels and handles are strong enough to handle the load. Some coolers feature oversized wheels that are ideal for tackling sandy beaches or rocky terrains, while others focus on compactness and portability.
3. Built-in Bottle Openers
Anyone who’s ever tried to open a bottle without a proper bottle opener knows how frustrating it can be. Fortunately, many coolers today come equipped with built-in bottle openers, eliminating the need to search for one when you’re ready to crack open a cold beverage.
Convenient and Practical
A built-in bottle opener can be a game-changer, particularly for outdoor activities such as tailgating, camping, or beach outings. These openers are usually located on the side or front of the cooler, offering easy access without the need to dig through bags or other gear. Whether you’re opening a soda, a beer, or a sparkling water bottle, having a built-in bottle opener means no more fumbling around or looking for sharp objects to pry off caps.
Some coolers feature traditional bottle openers, while others offer specialized versions designed to quickly remove caps with minimal effort. High-quality bottle openers are durable and built to last, even with frequent use, so they’re a reliable tool to have around when you’re enjoying drinks outdoors.
Versatility and Placement
Most built-in bottle openers are designed to handle a wide variety of bottle caps, whether it’s standard or twist-off. This versatility ensures that you’ll always have a functional tool available, regardless of what beverage you’re drinking.
In terms of placement, bottle openers are typically located on the cooler’s exterior for easy access. Some coolers even integrate them into the cooler’s handles, ensuring that they’re always within arm’s reach. For those who prefer a more streamlined look, you can also find coolers with hidden bottle openers, where the opener is concealed until needed.
4. Drain Plugs
Drain plugs are a seemingly simple feature, but they can make a world of difference when it comes to maintaining your cooler. A good drain plug allows you to easily empty melted ice or any residual water without the hassle of tilting the cooler and potentially spilling its contents.
How Drain Plugs Work
Drain plugs are typically located at the bottom of the cooler and feature a simple twist-on/twist-off mechanism. When the ice in the cooler begins to melt, the water pools at the bottom, and you’ll need a way to get rid of it. Simply open the drain plug, and the water will flow out, leaving the cooler dry and ready for use again.
Some drain plugs are equipped with a hose connector, allowing you to attach a hose to direct the water flow away from the cooler. This can be especially useful when you’re dealing with large amounts of water or when the cooler is sitting on uneven ground where water might collect in undesirable places.
Maintenance and Ease of Use
One of the best things about drain plugs is how easy they make cleaning and maintaining your cooler. After a long day of use, all you need to do is open the plug and let the water drain out. This process helps prevent any mold or mildew buildup, which is a common issue if water is left to stagnate inside the cooler.
Some high-end coolers feature drain plugs with advanced designs, such as ones that include anti-microbial properties to prevent odors or bacteria from accumulating. These can be a great option for those who use their coolers frequently or in high-humidity environments.
7. Alternatives to Traditional Ice Coolers
When it comes to keeping food and drinks cold during your outdoor activities or road trips, traditional ice coolers have long been the go-to option. However, there are now many innovative alternatives to these classic coolers that offer additional convenience, flexibility, and performance. In this section, we will explore three popular alternatives to traditional ice coolers: insulated bags, electric coolers, and portable refrigerators. Each alternative offers unique features that cater to different needs, whether you’re looking for portability, consistent cooling, or enhanced convenience.
Insulated Bags: Lightweight and Compact Cooling Solutions
Insulated bags, often referred to as soft-sided coolers, are an excellent alternative for those looking for a convenient and lightweight option to store chilled goods. These bags are typically made from durable, insulated materials like foam or a combination of insulation and waterproof fabrics. They are designed to keep your food and beverages cool for hours without the bulkiness of traditional hard-shell coolers.
Key Features of Insulated Bags
-
Portability: One of the main advantages of insulated bags is their portability. They are lightweight and flexible, allowing them to be easily carried around. Many models come with adjustable shoulder straps or handles, making them comfortable to transport even when filled with drinks and food.
-
Compact Size: Insulated bags are available in various sizes, ranging from small, single-person bags to larger models that can accommodate several people’s worth of food and drinks. Their compact size makes them easy to store in the car, RV, or even in the trunk.
-
Versatility: While insulated bags are great for picnics, road trips, or beach outings, they can also double as lunch bags or grocery bags. They are particularly useful for short trips where you need to keep food or drinks cold for a few hours but don’t want the hassle of a bulky cooler.
-
Easy to Clean: Unlike hard coolers, which can be cumbersome to clean, most insulated bags are designed to be easy to wipe down. Many bags also come with removable liners, which can be washed for added convenience.
-
Affordability: Insulated bags are often more affordable than traditional coolers, making them a great option for budget-conscious consumers. Whether you’re using them for a quick outing or as a backup cooler, they provide great value for their price.
Best Uses for Insulated Bags
- Picnics: Insulated bags are perfect for packing lunch on a short outing. You can store sandwiches, drinks, and snacks, and the bag will keep everything cool for hours.
- Day Trips: For activities like hiking, fishing, or beach trips, insulated bags offer a compact solution to keep your food and drinks chilled without taking up too much space.
- Grocery Runs: Insulated bags are an eco-friendly and practical alternative to plastic bags when grocery shopping. They can help keep frozen or refrigerated foods cold until you get home.
Electric Coolers: Continuous Cooling with Convenient Power Options
Electric coolers, also known as thermoelectric coolers, have been gaining popularity in recent years, particularly for those who need continuous cooling without the need for ice. These coolers are designed to plug into your vehicle’s power outlet (usually via a 12V DC socket) or even to a standard AC power source, making them ideal for road trips, camping, and other activities where access to traditional refrigeration is limited.
Key Features of Electric Coolers
-
Constant Cooling: Electric coolers are powered by your vehicle’s battery, allowing them to keep your food and drinks at a consistent temperature, often much colder than what traditional coolers can offer without ice. Some models can even cool down to temperatures as low as 32°F (0°C), making them ideal for perishable foods.
-
Energy-Efficient: Many electric coolers use thermoelectric technology, which can efficiently regulate temperature without consuming excessive amounts of energy. Some models even have dual-temperature zones, allowing you to chill drinks in one section and store non-perishable foods in another.
-
Convenience for Road Trips: For long road trips or camping adventures, electric coolers offer a hassle-free solution. There’s no need to worry about running out of ice or dealing with soggy food. Simply plug in the cooler, and it will keep everything cool throughout your journey.
-
Dual Functionality: Some electric coolers can also double as warmers, allowing you to keep hot foods warm or even heat up leftovers while you’re on the go. This versatility can be especially useful during long drives or camping trips where you need to keep both cold and hot items at the right temperature.
-
Portability: While electric coolers are typically bulkier than insulated bags, many come with wheels or handles to make them easier to move around. They are still portable enough to be taken on trips and used at picnics or outdoor events.
Best Uses for Electric Coolers
- Road Trips: Electric coolers are great for keeping beverages, snacks, and perishable foods cool on long drives. They can also act as a backup for your car’s regular cooler, ensuring you always have a cold drink on hand.
- Camping and Outdoor Adventures: For camping, hiking, or any activity where you’re off the grid, an electric cooler can provide consistent cooling without the need to find ice. You can also use them in conjunction with a portable generator if you’re camping in remote locations.
- Tailgating: Electric coolers are popular for tailgating events since they can keep drinks cool without the mess of ice. Many models have additional features like cup holders or built-in USB charging ports, making them even more convenient.
Portable Refrigerators: Reliable and Powerful Cooling Solutions
For those who need a more advanced and reliable cooling system for their food and beverages, portable refrigerators offer an excellent alternative to traditional ice coolers. These compact fridges are designed for serious cooling and can be powered by both AC and DC outlets, making them incredibly versatile for long-term use in a variety of environments.
Key Features of Portable Refrigerators
-
Consistent Temperature Control: Portable refrigerators offer precise temperature control, allowing you to set the exact temperature you want, whether it’s for keeping items frozen or chilled. This feature makes them perfect for long trips or for storing a variety of perishable items such as meats, dairy, or fresh produce.
-
Dual Power Sources: Many portable refrigerators come with both AC (wall outlet) and DC (vehicle power outlet) options, giving you flexibility in how you power them. Some models also come with a built-in battery, which can keep the fridge running for several hours, even if you don’t have access to a power source.
-
Capacity and Storage: Portable refrigerators often have a larger capacity than traditional coolers, allowing you to store more food and beverages. They may have multiple compartments or adjustable shelves, making it easy to organize your items and maximize space.
-
Energy Efficiency: While portable refrigerators tend to be more energy-intensive than insulated bags or electric coolers, many high-end models are designed with energy-efficient compressors that minimize power consumption. This is particularly important for long-term use, such as when you’re camping or on an extended road trip.
-
Durability and Performance: Built to withstand the elements, portable refrigerators are designed for rugged environments. They are often made from heavy-duty materials and can handle the rough and tumble of outdoor adventures without compromising performance.
Best Uses for Portable Refrigerators
- Extended Road Trips: Portable refrigerators are ideal for long journeys where you need consistent cooling for a week or more. Their precise temperature control means you don’t have to worry about your food spoiling, making them a great option for extended travel.
- Off-Grid Camping: If you’re camping in remote areas and have access to a power source, a portable fridge can keep your food fresh without the need for ice or constantly replenishing it.
- Boating and RVing: Portable refrigerators are also commonly used in RVs, boats, or motorhomes. They provide reliable cooling for perishable food and beverages while on the water or in the wilderness.

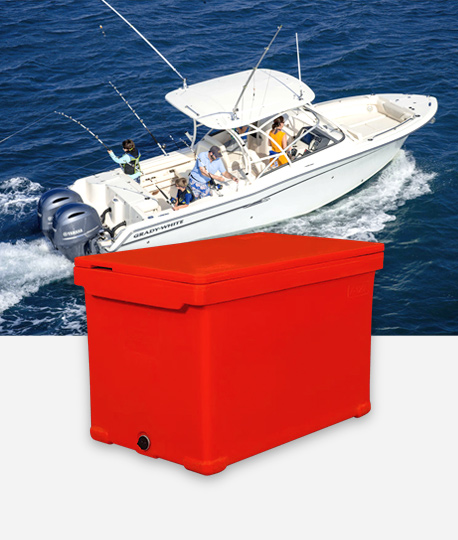
-4.png "X-120L Insulated Fish Bin Ice Cooler Box")
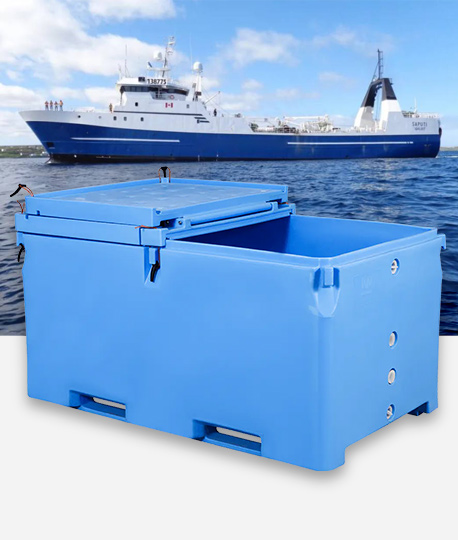
-4.png "X-70L Insulated Fishing Ice Cooler Box")
-2.png "X-68L Ice Cooler Box To Keep Food Cold And Fresh")

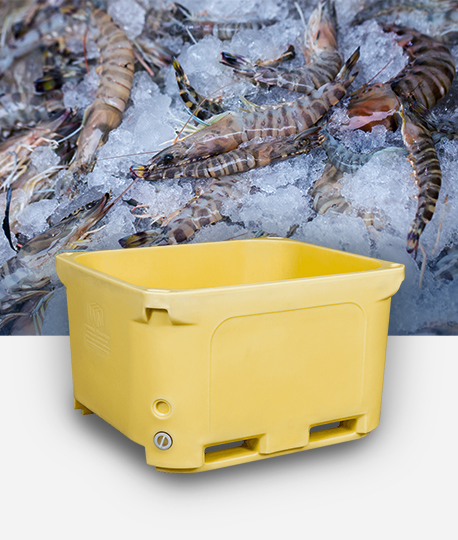
-2.png "X-120L Live Seafood Transportation Tanks")
-2.png "X-70L Live Seafood Transportation Tanks")